Pages

Monday, April 29, 2019

Aerodynamics | Home Chemistry

For science today, we had learnt about aerodynamics. First of all, we talked about what is aerodynamics and what are the forces in flight. There are four forces in flight, Gravity, Thrust, Lift and Drag. Below is what I had done. Hope you like it.

Aim: To learn about flight and aerodynamics.
Image result for flight forces
The definition of aerodynamics: according to Google definition, aerodynamics means - the study of the properties of moving air and the interaction between the air and solid bodies moving through it.

4 Forces of flight:


  1. Gravity
  2. Thrust
  3. Lift
  4. Drag

Paper Plane

Materials:

  1. Paper
  2. Scissors

Steps:

  1. Make a paper plane that can glide or go further.
  2. Make ailerons by cutting out the dotted line.
  3. Throw the plane without the ailerons.
  4. Next, throw with ailerons and record if it has gone further or not.
  5. Finally, throw with a paper clip on front. Record those three throws. Which one was the furthest? Which one worked, which one didn't?

Conclusion

Findings:

Below is the launches that our group had done.

Christian's Launch

Plane Type
Distance
Behaviour
Normal
5mStraight Line

Ailerons
1.9mCurves to the side

Paper clip


3.9mStraight Line


Khyle's Launch

Plane Type
Distance
Behaviour
Normal
3.6mStraight Line

Ailerons
3.2mCurves to the side and a loop.
Paper clip


5mStraight Line

In Christian's launch, the normal throw without anything went to five meters (the maximum) and hit the door. The throw was in a straight line going to the door. The second throw, was with the paper clip went to 3.9m with a straight line again. The thing was that it didn't go that far. The final throw was with the ailerons or the flaps. It went to 1.9m with some curves to the side.

Next was Khyle's turn to lunch. He had started with 3.6m with a normal throw, it went in a straight line like Christian's. Next, was the paper clip, the paper clip added some weight and gave his plane more distance, it went and hit the door, it's 5m. Also, it went in a straight line. The final throw with the ailerons, it had done curves to the side and a loop, but it landed on 3.2m.


I really liked this experiment it was enjoyable making the planes and how the planes' behaviour change when the flaps or ailerons come up or the paper clip is attached to the plane. 

What I'd learnt:

  • I think, when you have ailerons, your plane won't go further, but glide and curve to the side.
  • The behaviour of the plane changes when you attach or add something on. 


I hope you like my post about aerodynamics. I hope you learnt something new in this post. Comment down below what you've learnt today. Have a cool day!! Bye!!

Sunday, April 28, 2019

Fun at Diamond Harbour

Yesterday, we had gone to Diamond Harbour with my friends. We went there by the 'Black Cat' Diamond Harbour ferry. Here is a video from Black Cat about the ferry.


After watching this video, this might look fun, well really it is fun. But we hadn't been swimming. Here's a video that I've made.


I hope you like the movie that I have done. Comment down below if you've been to Diamond Harbour before and what was your experience there? Have a cool day!! Bye!!

Thursday, April 11, 2019

Balloon - Home Chemistry


For science today, we had to do an experiment which includes gases. First of all, we had talked about the different gases we know. 

Aim: To see which chemical mix creates the most gas.

Image result for baking soda balloons

Hypothesis: (What do I think will happen)
I think that the first balloon will be comprehensive, because of Carbon Dioxide. I am not sure if the second balloon will work or not.

Materials


  1. 2 Water Bottles (same size)
  2. 2 balloons
  3. Baking Soda
  4. Sparkling Lemonade
  5. White Vinegar
  6. Table Salt
  7. Classic Soda
  8. Water
  9. Plastic Spoon
  10. Funnel

Steps: Balloon 1

Result for Balloon 1
  1. Get one large plastic bottle and one balloon.
  2. Get some baking soda and white vinegar.
  3. With a funnel, pour ½ cup of vinegar in the bottle.
  4. Put 3 tsp of baking soda in the balloon.
  5. Carefully, put the balloon on the bottle.
  6. Wiggle the balloon so the baking soda will go in the bottle.
  7. Wait for the balloon to rise up.

Steps: Balloon 2

  1. Get one large plastic bottle and one balloon.
  2. Get some salt and soda.
  3. With a funnel, pour ½ a cup of soda in the plastic bottle.
  4. Put 3 tsp of salt in the balloon.
  5. Carefully, put the balloon on the bottle.
  6. Wiggle the balloon so the salt will go in the bottle.
  7. Wait for the balloon to rise up (if it rises up).


Result


Balloon 1
( 3 tsp baking soda, ½ cup vinegar)
Balloon 2
( 3 tsp salt, ½ cup soda)
Balloon Size (cm)
25cm4cm
Bubbles
(small, medium, large)
MediumSmall

Conclusion

This experiment was extraordinary. My hypothesis went right, the first balloon was comprehensive. But the second balloon went a bit awkward, the balloon went from 25cm to 4cm. I had heard about this experiment, but I hadn't tried this experiment, it was really exciting. I also learnt that you make Carbon Dioxide from this experiment.

I hope you like my post about the balloon experiment. Comment down below if you've done an experiment like that. Have a cool day!! Bye!!

Tuesday, April 9, 2019

"...but it was the wrong colour..."

Today, we had to write the 100 Word Challenge for this week. The prompt for this week is, "...but it was the wrong colour...". Here is my writing...

It was a bright sunny day in Earth, Texas. Noah was preparing to paint his tremendous house. He was determining what colour he should paint his room. There were two choices, Blue or Green, he didn’t know what colour to pick. He knew that any colour he will decide will look good. Noah went to the stores to purchase some paint. He gave the paint to his painter, William. He didn’t understand what colour Noah preferred, so he began to paint. The next day, Noah came to his room to check. Noah yelled at William, “But, it’s the wrong colour!!”


I hope you like my post about my 100 Word Challenge. Comment down below if you've done the 100 Word Challenge before. Have a cool day!! Bye!!

Monday, April 8, 2019

Lake Tekapo & Lake Pukaki

So on 7th April, our family had been to Lake Tekapo and Lake Pukaki. I have made a video to show you my time at Lake Tekapo & Lake Pukaki. Here it is. Hope you like it.


Comment down if you've been to Lake Tekapo or/and Lake Pukaki before. I hope you liked our post about Lake Tekapo & Lake Pukaki. Have a cool day!! Bye!!

Skittles | Home Chemistry

This is my second experiment of the day. This is about Skittles. We had to separate the skittles in a Petrie Dish.

Aim: To separate colours from skittles by using the chromatography.
Start

Materials


Skittles' colour separating
  1. Petrie Dish
  2. Skittles
    1. Green
    2. Yellow
    3. Two Red
    4. Orange
    5. Purple
  3. Water

Process
Result

  1. Get a Petrie Dish.
  2. Get 6 skittles with different colours (Green, Yellow, two Red, Orange and Purple). 
  3. Spread the skittles on the edges of the Petrie Dish.
  4. Put water to the middle of the Petrie Dish.
  5. Watch the Skittles spread apart.
Conclusion


I really enjoyed this experiment because it was fun and enjoying the skittles' colours go away. I learnt that chromatography is a method of material spreading away. I learnt that Skittles can be used in different ways.


I hope you liked my post about Skittles. Comment down below if you've done an experiment like that. Have a cool day!! Bye!!

Rainbow Paper | Home Chemistry

Today, for science, we had studied about forensic science. So first, we had brainstormed about Forensics. We had brainstormed that Forensics is about...

  • Fingerprints
  • Appearance
  • Forgery
  • Genealogy
  • Footprints
  • DNA
  • Ballistics

Aim: To separate colours by using the process of chromatography.

Materials:

- Filter Paper
- Water Based felt pens
- A plastic cup
- Water
- Pencil
Process:

  1. Be in a group of three for the experiment. Collect Filter Paper and two water-based felt pens.
  2. Measure 1 cm and lightly rule 1 cm across the paper (left to right). Make two dots from the water-based felt pens. Our group used Black and Dark Blue.
  3. Put your filter paper in a small plastic cup. Leave some space under the filter paper so it doesn't touch the bottom. Fold the paper so the paper is in the air. 
  4. Finally, put some water in the left space in the cup. Leave the cup for a while and observe the colour changing and travelling.

Conclusion:

There are a few things that I had learnt today:

About Forensics Science, forensic science is a way of solving a crime. Such as Fingerprints, Appearance, Forgery, Genealogy, Footprints, DNA and Ballistics.

What did I observe?

There are a few things that I observed in this activity. 

Firstly, the colours had been travelling on the filter paper. The colours were moving from bottom to top. Secondly, the colours had been changing quickly. Thirdly, the colours had been changing when the colours were travelling.

Friday, April 5, 2019

Time with Kerry Du Pont!! | Media Team

Image result for kerry du pont
Kerry Du Pont
Credit: https://assets.about.me/background/kerrydupont_1292644941_23.jpg

Today, we had a special guest that had come to meet the Media Team at Hornby Primary School. It was Kerry Du Pont. He is a director for mostly TVNZ 2. Kerry directs shows like Fanimals, What Now and more shows which come on 'Hei Hei'.

Hei Hei has its own app and website that you can watch. Hei Hei features kid shows. Kerry said that new episodes upload on Hei Hei first and not the TV.

Let's go back to the topic. Kerry had talked to us about film techniques. First, he talked about storyboards. Every story has a beginning, middle and end. So, for example, he chose a helicopter going to take off. The first scene was at the news reporter it was a medium shot. The second shot was at the helicopter, going to take off, a wide shot. The third shot was the helicopter in the air, which was a big wide shot. Which is a super far shot.
Image result for pan camera shot
Diagram of Pan and Tilt
Credit: https://s3.amazonaws.com/studiomaven-legacy-img/Pan12.jpg

Image result for crab camera movement
Crab
Credit: http://www.indefilms.net/assets/images/tracking.gif

Next, he told us about ways how we can move the camera with. First, he told us about Pan. Pan is where you move from left and right with the camera. It is like a panorama.

Secondly, he told us about Tilt. We all know what is Tilt. It is where you move the camera up and down.

Our third one was the Crab, which the camera from left to right while looking at the object. The crab movement is used when the person or object is moving from left to right or right to left.

The last one is Track. It is similar to crab but the camera is facing front not sideways. Kerry had said that you can use track by using office chairs. You put the camera or recording device on the office chair and push the chair.

Kerry said, when you are being recorded, look at the camera. He also said that if we forget or don't know what to say, always look at the camera. You can add a question by their last answer. For example: "I really like playing sports." You can ask, "What type of sports do you like playing?" Like that.

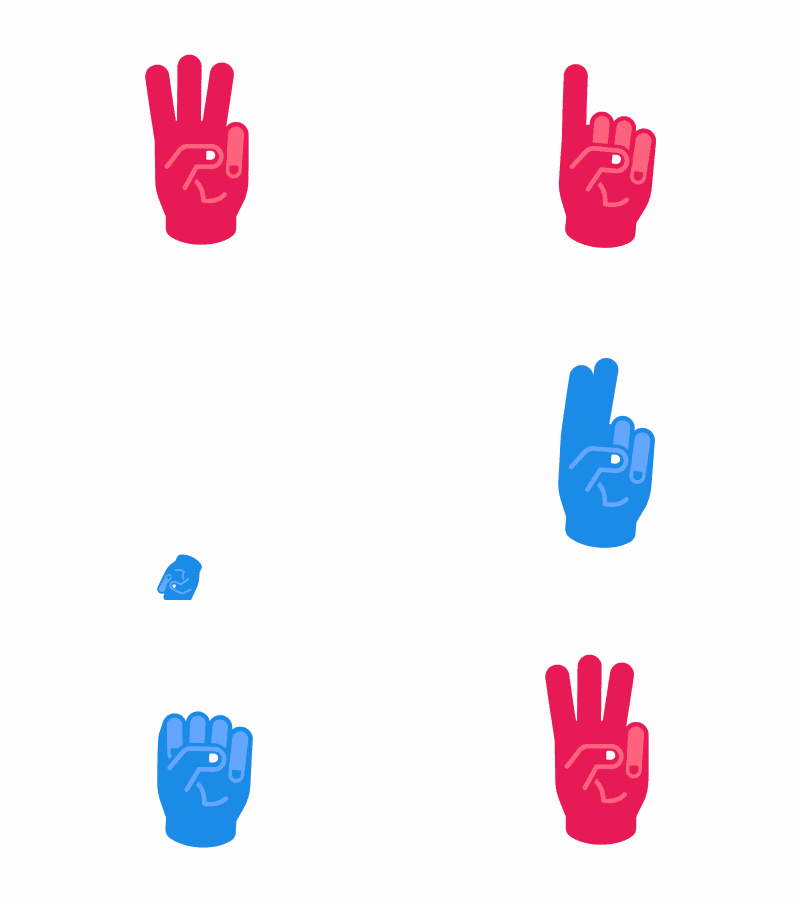
Image result for countdown gif fingerThe next thing Kerry said was about recording clips. He said to record more than you need. Sometimes you need those extra clips, sometimes you don't. It is best to countdown before you start your recording. It is because everyone knows when the recording starts. The tip Kerry had given was that when you countdown, when you countdown from 5 to 3 you say it and 2,1 you do it silently, using your fingers.

After Kerry discussed about film techniques, he taught us about interviewing people. We should always start with the introduction (as I told you). Start with, "I am at ____ and I am with ____." We should include what we are doing, where we are and why are they here. Next, he told us about interview questions. 

Image result for Interview
Credit: https://images-blogger-opensocial.googleusercontent.com/
Afterwards, we got taught about what we should do, our behaviours and your mood while being recorded. We should have an interest in what we are talking about. If a reporter is not having a good day, we could see that by their face, expressions, way of talking and more. So, Kerry said to have interest and forget what bad had happened so far. To have a good movie, video or others, you should watch your self after recording, this is a good thing because you will know if you need to reshoot or not. We should always listen to the director. I am saying that because some people might think that the director is bossy and telling people what to do, but that is the directors' job. Sometimes the director might say to reshoot that scene or clip again until it is good or perfect. You should always plan before you shoot.

Here some pictures of us with Kerry Du Pont. Hope you like it.


Image result for angry director gif
Credit: https://media.giphy.com/
So, this is what I need to say today. I hope you like my time with the Media Team with Kerry Du Pont in Hornby Primary School. Comment down below what you'd learnt today!! Have a cool day!! Bye!!

Wednesday, April 3, 2019

Introduction | Home Chemistry

Aim: To learn the names of 10 household chemicals and identify if they are a solid, liquid or a gas.

Equipment:


  1. Soap
  2. Lemon Juice
  3. Salt
  4. Sugar
  5. Vinegar
  6. Milk
  7. Onion Gas
  8. Bleach
  9. Baking Soda
  10. Lemonade


Task 1: Put the 10 chemicals in a chart with the titles - Name, Chemical ingredient(s), Image, Solid/Liquid/Gas.


Name

Chemical

Image

Solid/Liquid/Gas

Salt
Sodium Chloride
Solid
Soap
Sodium and Potassium Salts
Solid
Lemon Juice
Citric Acid
Liquid
Sugar
Sucrose
Solid
Vinegar
Acetic acid
Liquid
Milk
Lactose
Liquid
Onion Gas
Syn-propanethial S-Oxide
Solid
Bleach
Sodium hypochlorite
Liquid
Baking Soda
Sodium bicarbonate
Solid
Lemonade
Citric Acid
Liquid

Conclusion - What did I learn:

I had learnt all from the table that I had made. I had learnt only the chemical ingredients of the household items.


  • Salt - Sodium Chloride
  • Soap - Sodium and Potassium Salts
  • Lemon Juice - Citric Acid
  • Sugar - Sucrose
  • Vinegar - Acidic Acid
  • Milk - Lactose
  • Onion Gas - Syn-propanethial S-Oxide
  • Bleach - Sodium hypochlorite
  • Baking Soda - Sodium bicarbonate
  • Lemonade - Citric Acid